First look at the admin console
When you finish deploying through Amplify and open your store's admin address for the first time, you will not be greeted by a long wizard. You will see a clean login and claim screen.
This guide walks you through claiming your super admin identity and getting familiar with an operation center built for your complete control.
Claiming your admin rights via /setup
Right after deployment, the database is a blank slate. Fatleon uses a first-visitor claim: the first person to open the admin site becomes the super admin.
| Step | Action | Description |
|---|---|---|
| 1 | Access /setup | After your first deployment, visit your admin URL. The first person to enter the site is guided to /setup, the administrator configuration screen. |
| 2 | Configure essentials | Once inside, open System and set your website name, domain, email configuration, and payment information. If other team members join later, grant them access from the admin panel. |
Your command center at a glance
Once logged in, you land on the Admin Dashboard. The layout stays restrained: a dark sidebar fixed on the left, and a high-density light workspace on the right.
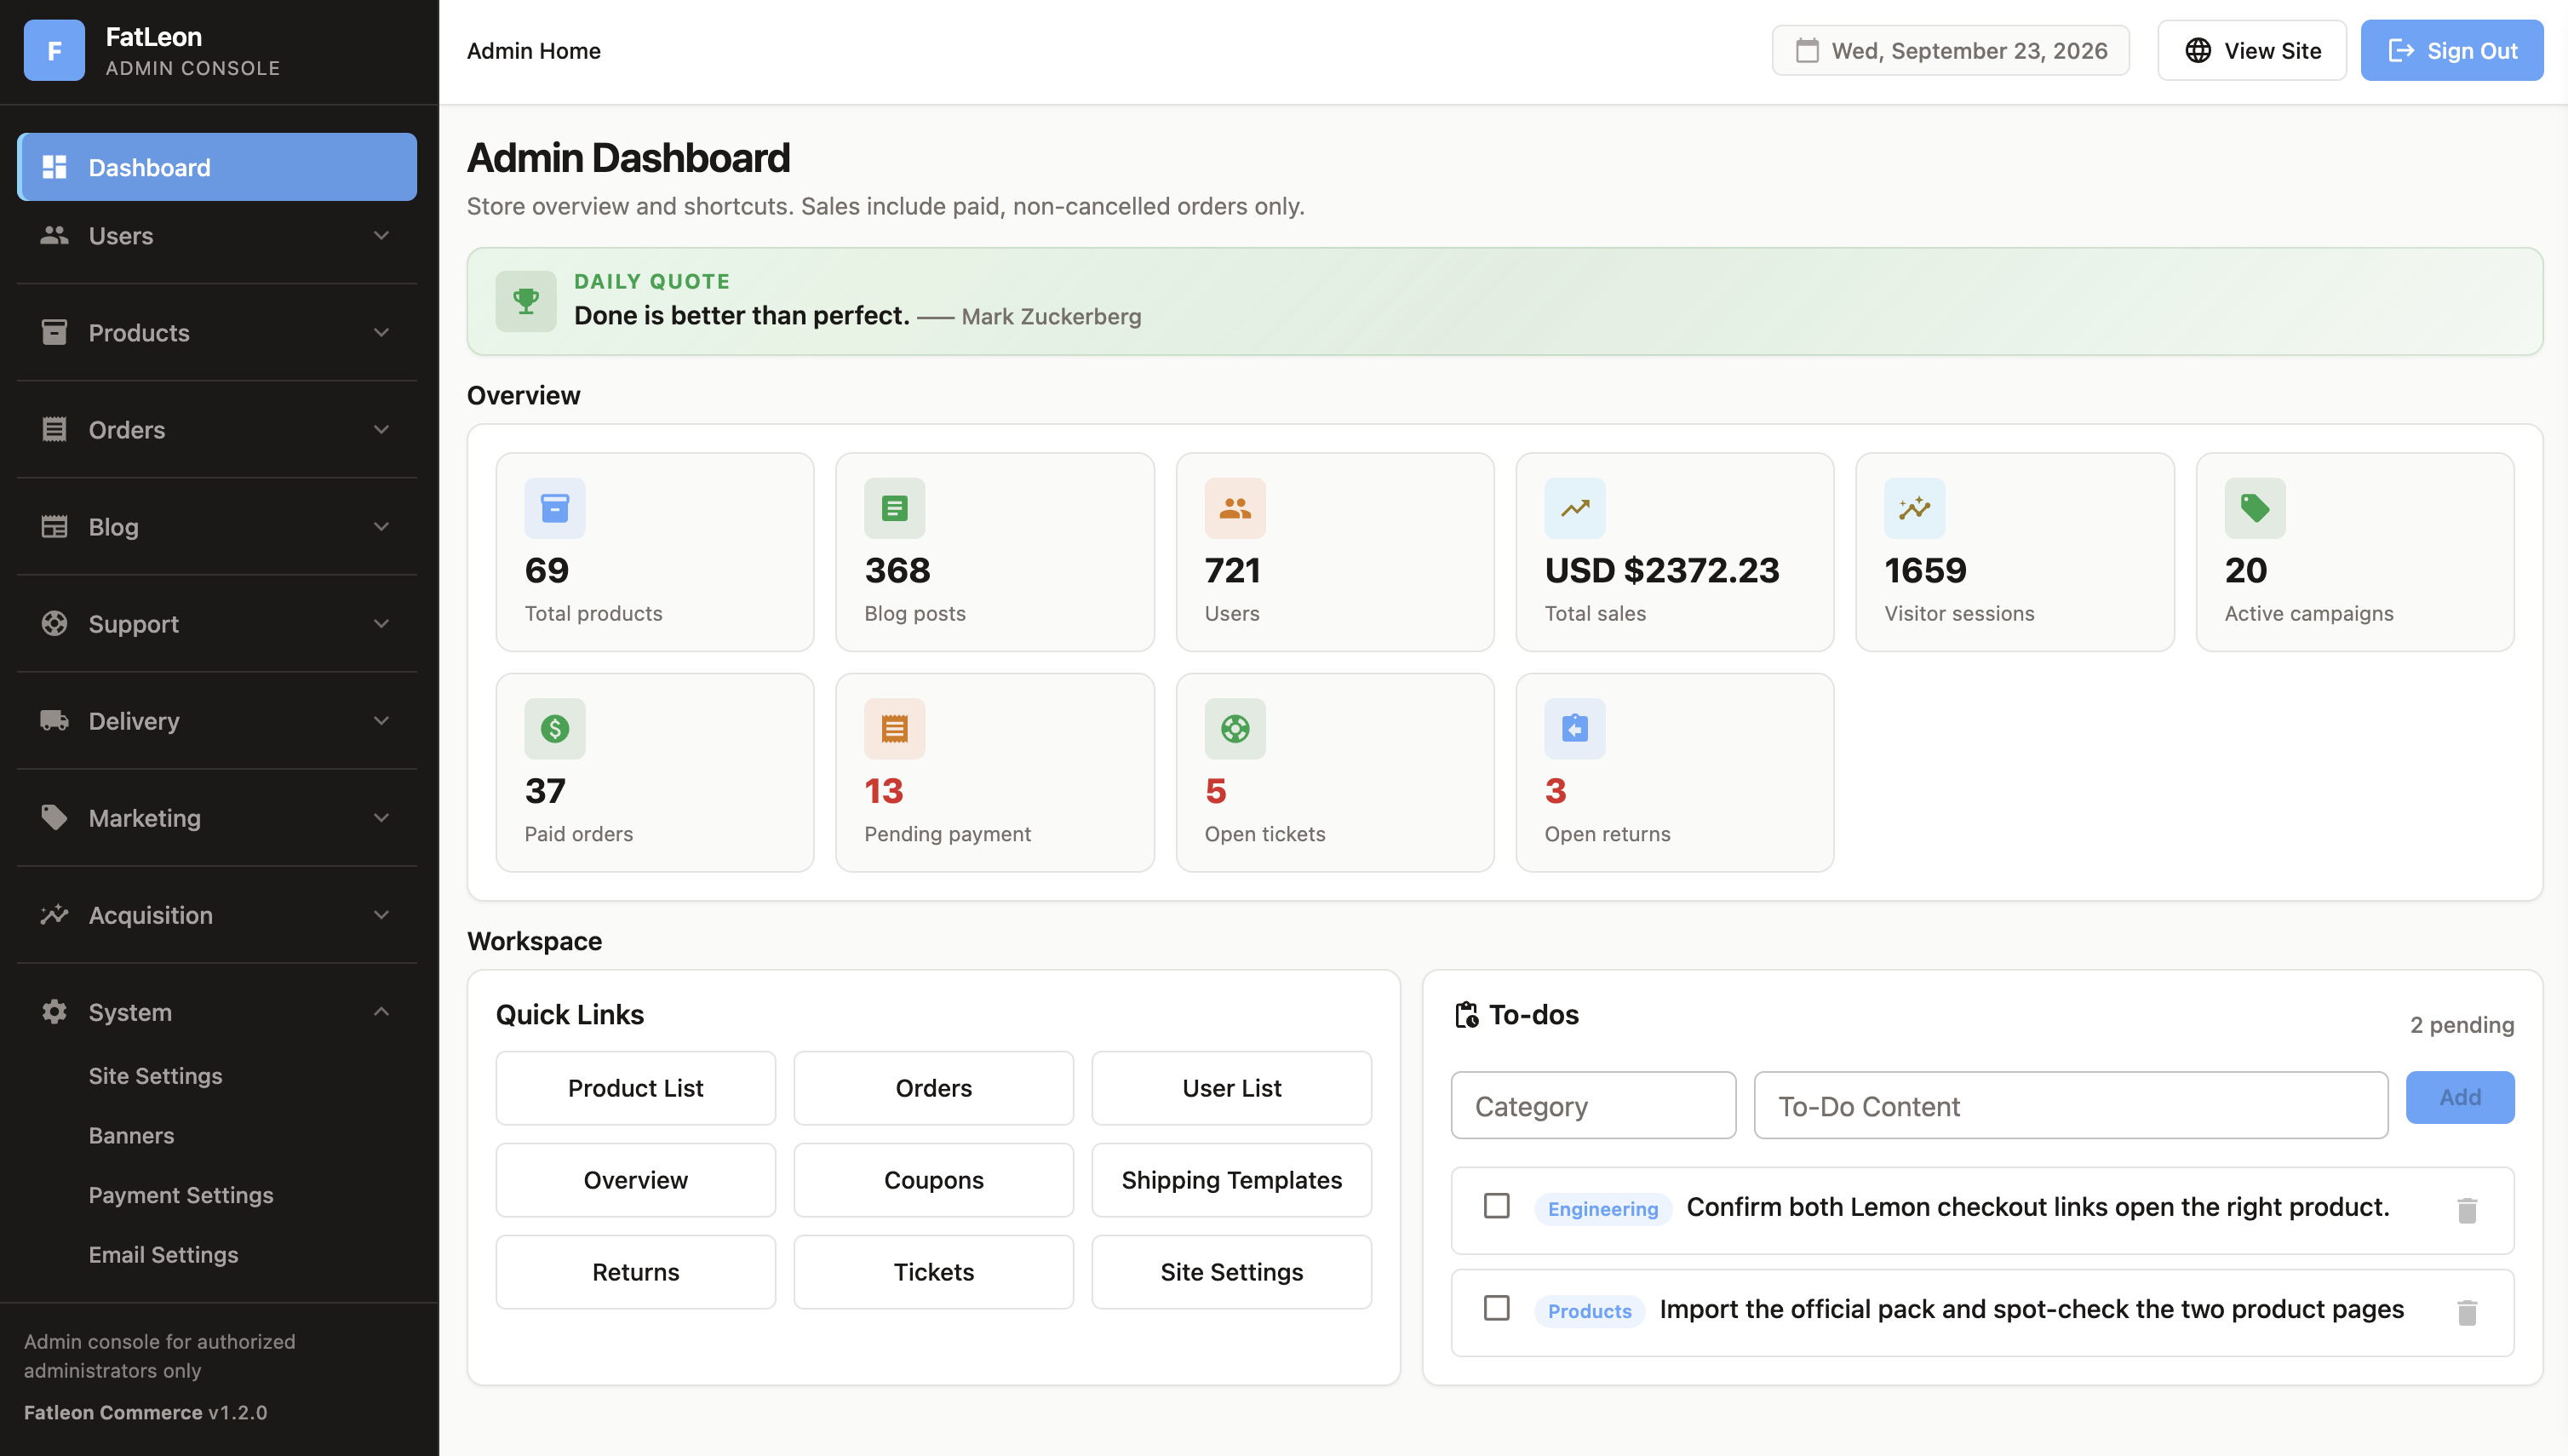
Navigation and layout
Top bar. Shows the current date, plus shortcuts such as View Site (open the storefront preview) and Sign Out. The top-left corner displays Fatleon ADMIN CONSOLE.
Sidebar. Organizes the store lifecycle into clear sections:
| Section | What it covers |
|---|---|
| Dashboard & Users | Overall metrics, plus customer and account management. |
| Catalog & Operations | Products, categories, inventory, orders, and fulfillment. |
| Growth & Support | Blog, homepage carousel, feature banners, page layout, tickets, customer service, delivery, marketing campaigns, and acquisition. |
| System | Underlying settings: Site Settings, Payment Settings, Email Settings, and related configuration. |
The bottom-left corner shows the current version (for example, Fatleon v1.2.0).
Dashboard metrics and daily workflow
The homepage dashboard uses cards to show store status directly.
Core overview metrics
| Metric category | What it tracks |
|---|---|
| Catalog & Content | Total products and blog posts. |
| Traffic & Users | Users and visitor sessions. |
| Sales & Marketing | Total sales (paid, non-cancelled orders) and active campaigns. |
| Action items | Paid orders waiting to ship, pending payment, open tickets, and open returns — your daily to-do list. |
Workspace shortcuts and to-dos
Quick links. Frequently used pages (Product List, Orders, User List, Coupons, Shipping Templates, and similar) are one-click buttons, so you do not have to dig through menus.
To-dos. A built-in checklist for daily maintenance. Add a task and check it off in the admin panel — for example, “Confirm both Lemon checkout links open the right product.” It works well for independent operators and small teams passing internal notes.
Multi-admin and security boundaries
Fatleon keeps admin permissions straightforward.
Design philosophy. There is no heavy role system and no multi-layer approval workflow. Anyone with admin access has full control of the store, so daily work stays direct.
Audit logs. The system records important configuration changes. If core settings are adjusted, you can trace them in the operation logs.
Next step
With the admin layout in place, continue to Data preparation and import to bring in products, brands, tags, banners, and system configuration.